Setting up Spotlight.ai MCP Server in Claude (Claude Admins)
Last updated: September 1, 2026
This article is designed for Claude Organization Admins, not for end users, which can be found here.
Overview
The Spotlight.ai MCP connector allows your team to use Claude to inspect deals, review MEDDIC qualification status, and surface meeting insights — all powered by live data from Spotlight.ai.
There are two setup steps: an admin adds the connector for the organization, and each user authenticates their own account.
Add the Connector for Your Organization (Admin)
Click + Add → Custom → Web
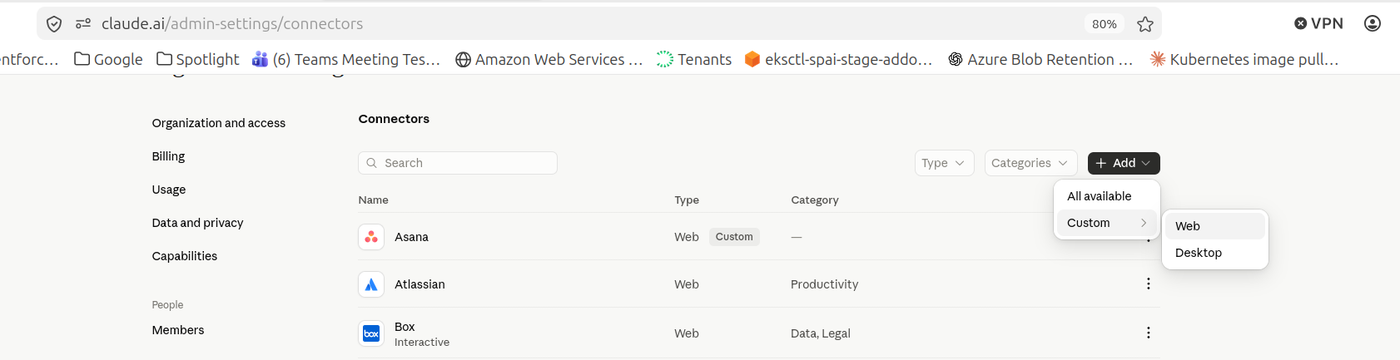
Fill in the connector details:
Name — Any name you want to give to this connector (e.g.,
Spotlight.ai MCP Server)URL — "https://app.spotlight.ai/v1/api/mcp" (or "https://stage.spotlight.ai/v1/api/mcp" if connecting to your staging environment)
If your company uses a custom domain with Spotlight.ai (e.g., "https://acme.app.spotlight.ai"), make sure you use this URL.
Click "Continue"
Authentication - Select Always required
OAuth client - Select Use your own OAuth client
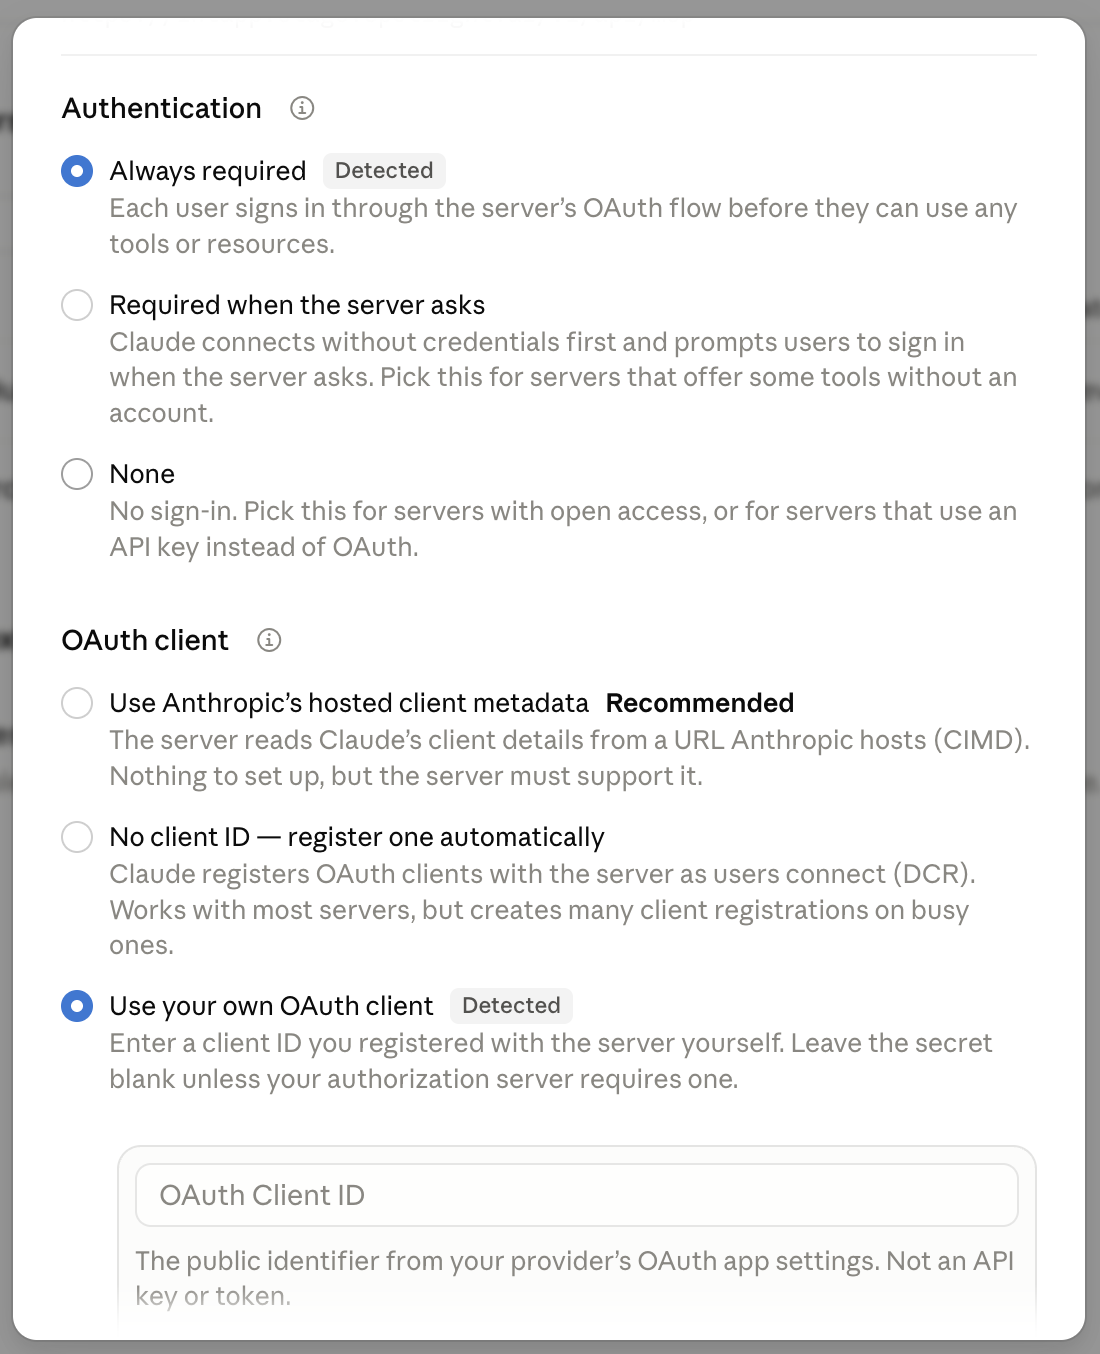
OAuth Client ID — will be provided by Spotlight.ai upon request
OAuth Client Secret — will be provided by Spotlight.ai upon request
Click Close
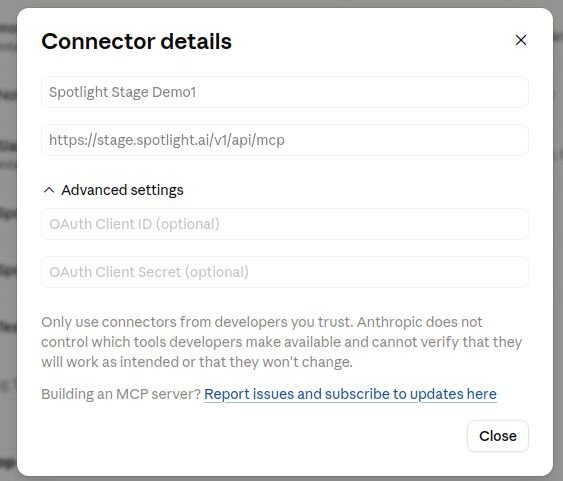
That's it. The connector should be ready for use.
Need help?
Contact Spotlight.ai support if you have questions about enabling the MCP server for your organization.